Learn, Create and Share Your DIY Craft Ideas

No
matter what your skill level is, Do-It-Yourself projects and crafts
are always easy to pull off and fun to make. DIY not just lets you
create your own stuff but also develop social networking and meet new
people and of course you can develop, customize, and reinvent many
things. They make great gifts too. So let’s get started!!
You require: Paper
clips, fancy buttons, and hot glue, felt
Instructions: All
you have to do is hot glue your paper clip to the back of your button
and then cut a small piece of felt to go on top (curve area). The
felt will keep the glue sealed in and leave a smooth finish. It’s
done!! There are so many fun buttons you can use to get creative.
These would make great gifts too.
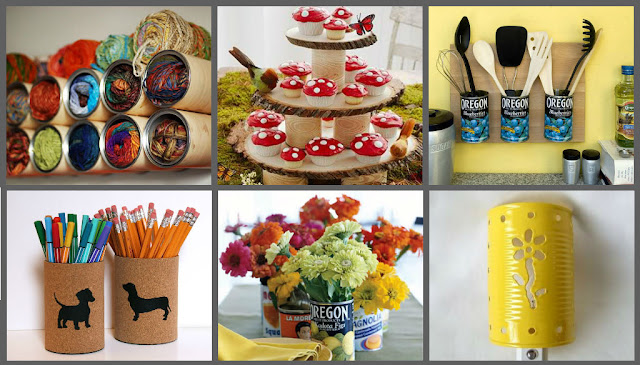
Gather
your materials: Piece of driftwood or branch, masking tape, paint
and paint brushes, picture hangers, screw in hooks, hammer, and
pliers.
Instructions:
Start with a clean, dry wood and use tape to mask off the paint
stripes. Make sure to flatten the edges of the tape thoroughly so
that no paint seeps underneath. Paint your first stripes and let them
dry. Carefully remove the tape. Repeat taping and painting with
different colors.
Find
the side of the wood which is most flat, in order to lie against a
wall. On the side, hammer in one or two pictures hangers, depending
on the length of the hanger and of the objects that you would like to
hang on it.
Last step! Decide where
you have to place your hooks and screw them into the wood, use pliers
if necessary. Now put it on your wall and hang your favorite stuff on
it! Use it for jewelry or keys or spoons.
You need: Ribbons
(2 different colors), scissors
Instructions: Cut
two generous amount of each color. Fold each cut of ribbon in half to
find the center. Take center of the first ribbon you would like to
work with and grab your headphones and make your knot. Keep knotting
until you finish, if you want to change the color you can either
count the number of knots or eyeball the length of stitches. When you
add a color make the knot around the previous color. Eventually you
will end up covering the length of the headphones. You can cover the
individual bud wires or leave them uncovered. And it’s done!! You
can gift them to your buddies.
You
require: A basic t-shirt, a black fabric dye, a self-adhesive
paper, scalpels, brush
Instructions: Put
a baking paper covered board inside the t-shirt, that protect it from
stains. Choose from the net a city silhouette or any nice image you
like. Then stick it in the back of self-adhesive paper. Cut out it
with the scalpels. Then put onto the T-shirt. Paint it with big
brush, and with big movements. The stencil haven’t got bottom, so
the bottom will not be straight rather fading. Carefully remove the
stencil. Iron the shirt inside out. Put inside the T-shirt a rag.
Here you go!

Comments
Post a Comment